Octopress Setup
在Windows系统下使用Octopress及Github Pages建立个人博客。
安装Octopress
下载Octopress
可以使用Git下载,也可以直接到Github页面下载zip包。
下载完成后,保存在当前路径的octopress文件夹下。1git clone git://github.com/imathis/octopress.git octopress安装Ruby
http://rubyinstaller.org/安装DevKit
- RubyInstaller 版本<2.4.0
http://rubyinstaller.org/downloads/ (注意:DevKit的版本需要对应Ruby的版本!)
下载后解压后执行以下命令完成安装:1 2 3
cd DevKit ruby dk.rb init ruby dk.rb install –force - RubyInstaller 版本2.4.0
安装RubyInstaller的过程中会有三个选项,此时按Enter即可。
或者通过执行rake install 1 2 3来完成。
- RubyInstaller 版本<2.4.0
为Ruby换源
由于ruby资源访问较慢,建议国内用户换成RubyChina源。
第二步有时会因网络原因失败,多试几次就行了。
1
2
3
gem sources –remove https://rubygems.org/ gem sources -a https://gems.ruby-china.org/ gem sources -l修改octopress\Gemfile文件第一行为
1source “http://ruby.taobao.org/”安装Octopress的相关依赖
1
2
3
cd octopress gem install bundler bundler install此时如果有报错提示没有安装rdiscount
安装rdiscount,请自行将"2.1.8"替换成控制台提示的版本。
之后重试bundler install。1 2
gem install rdiscount -v ‘2.1.8’ bundler install完成Octopress的安装
1rake install此时如果有报错提示
you have already activated rake x.x.0.0, but your gemfile requires rake x.x.0.0则需要在rake命令前添加前缀:
1bundler exec rake install
配置Octopress
建立代码仓库
在Github中建立名称为YOURNAME.github.io的代码仓库配置站点信息
打开octopress\_config.yml文件,
修改url为YOURNAME.github.io,同时填写title、author等信息。部署Github Pages
1rake setup_github_pages生成网站
1rake generateLiquid Exception
若出现Liquid Exception: undefined method 'gsub' for nil:NilClass in atom.xml,
则需要打开octopress\plugins\octopress_filters.rb,将第3行修改为第4行所示的代码。1 2 3 4
def cdata_escape(input) #input.gsub(/<![CDATA[/, '<![CDATA[').gsub(/]]>/, ']]>') input.to_s.gsub(/<![CDATA[/, '<![CDATA[').gsub(/]]>/, ']]>') end发布网站文件
将网站文件上传到master分支下:1rake deploy上传网站源码
将网站源码上传到source分支下:1 2 3
git add . git commit -m ‘First commit’ git push origin source创建新文章
会在octopress\source\_posts下新建一个markdown文件,
用文本格式打开后可以对文章进行编辑。1rake new_post[“title”]预览网站
执行以下指令后,在浏览器中访问localhost:4000即可。
它会监听html、css和markdown文件的变动,所以每次修改完只需要刷新浏览器就行了。
1rake preview发布修改后的网站
修改后需要再次执行deploy命令发布到Github,才能通过github.io访问到最新的网页。1 2 3 4 5
rake generate git add . git commit -am “comments” git push origin source rake deploy
配置已有的Octopress
在新机器上安装Github上已有的Octopress网站
获取网站源码,存放在octopress目录下
1git clone -b source git@github.com:YOURNAME/YOURNAME.github.io.git octopress获取网站文件,存放在octopress/_deploy目录下
1 2
cd octopress git clone git@github.com:YOURNAME/YOURNAME.github.com.git _deploy安装部署Github Pages
1
2
3
gem install bundler
bundle install
rake setup_github_pages
如果发布时提示
[rejected] master -> master (non-fast-forward),则需要再同步一下_deploy目录1 2 3 4 5 6 7 8
cd _deploy
git pull origin master –allow-unrelated-histories
git checkout –theirs .
git add .

cd ..
rake generate
rake deploy
其它配置
主页只显示文章摘要
在文章中适当的地方插入<!--more-->, 同时修改octopress\_config.yml:1excerpt_link: “read more”支持disqus评论
需要先在Disqus.com注册帐号, 并进入Settings -> Add Disqus To Site。
新建一个站点myblog.disqus.com,其中myblog就是你的shortname。
然后修改octopress\_config.yml:1 2
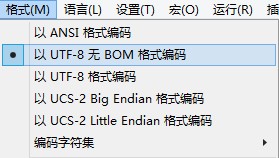
disqus_short_name: YOUR_NAME
disqus_show_comment_count: true
Markdown中文编码
若提示中文编码存在问题,将文件转换成UTF-8无BOM格式即可。
可以使用Notepad++进行处理:
Last updated on March 22th, 2018